Raising Mealworms
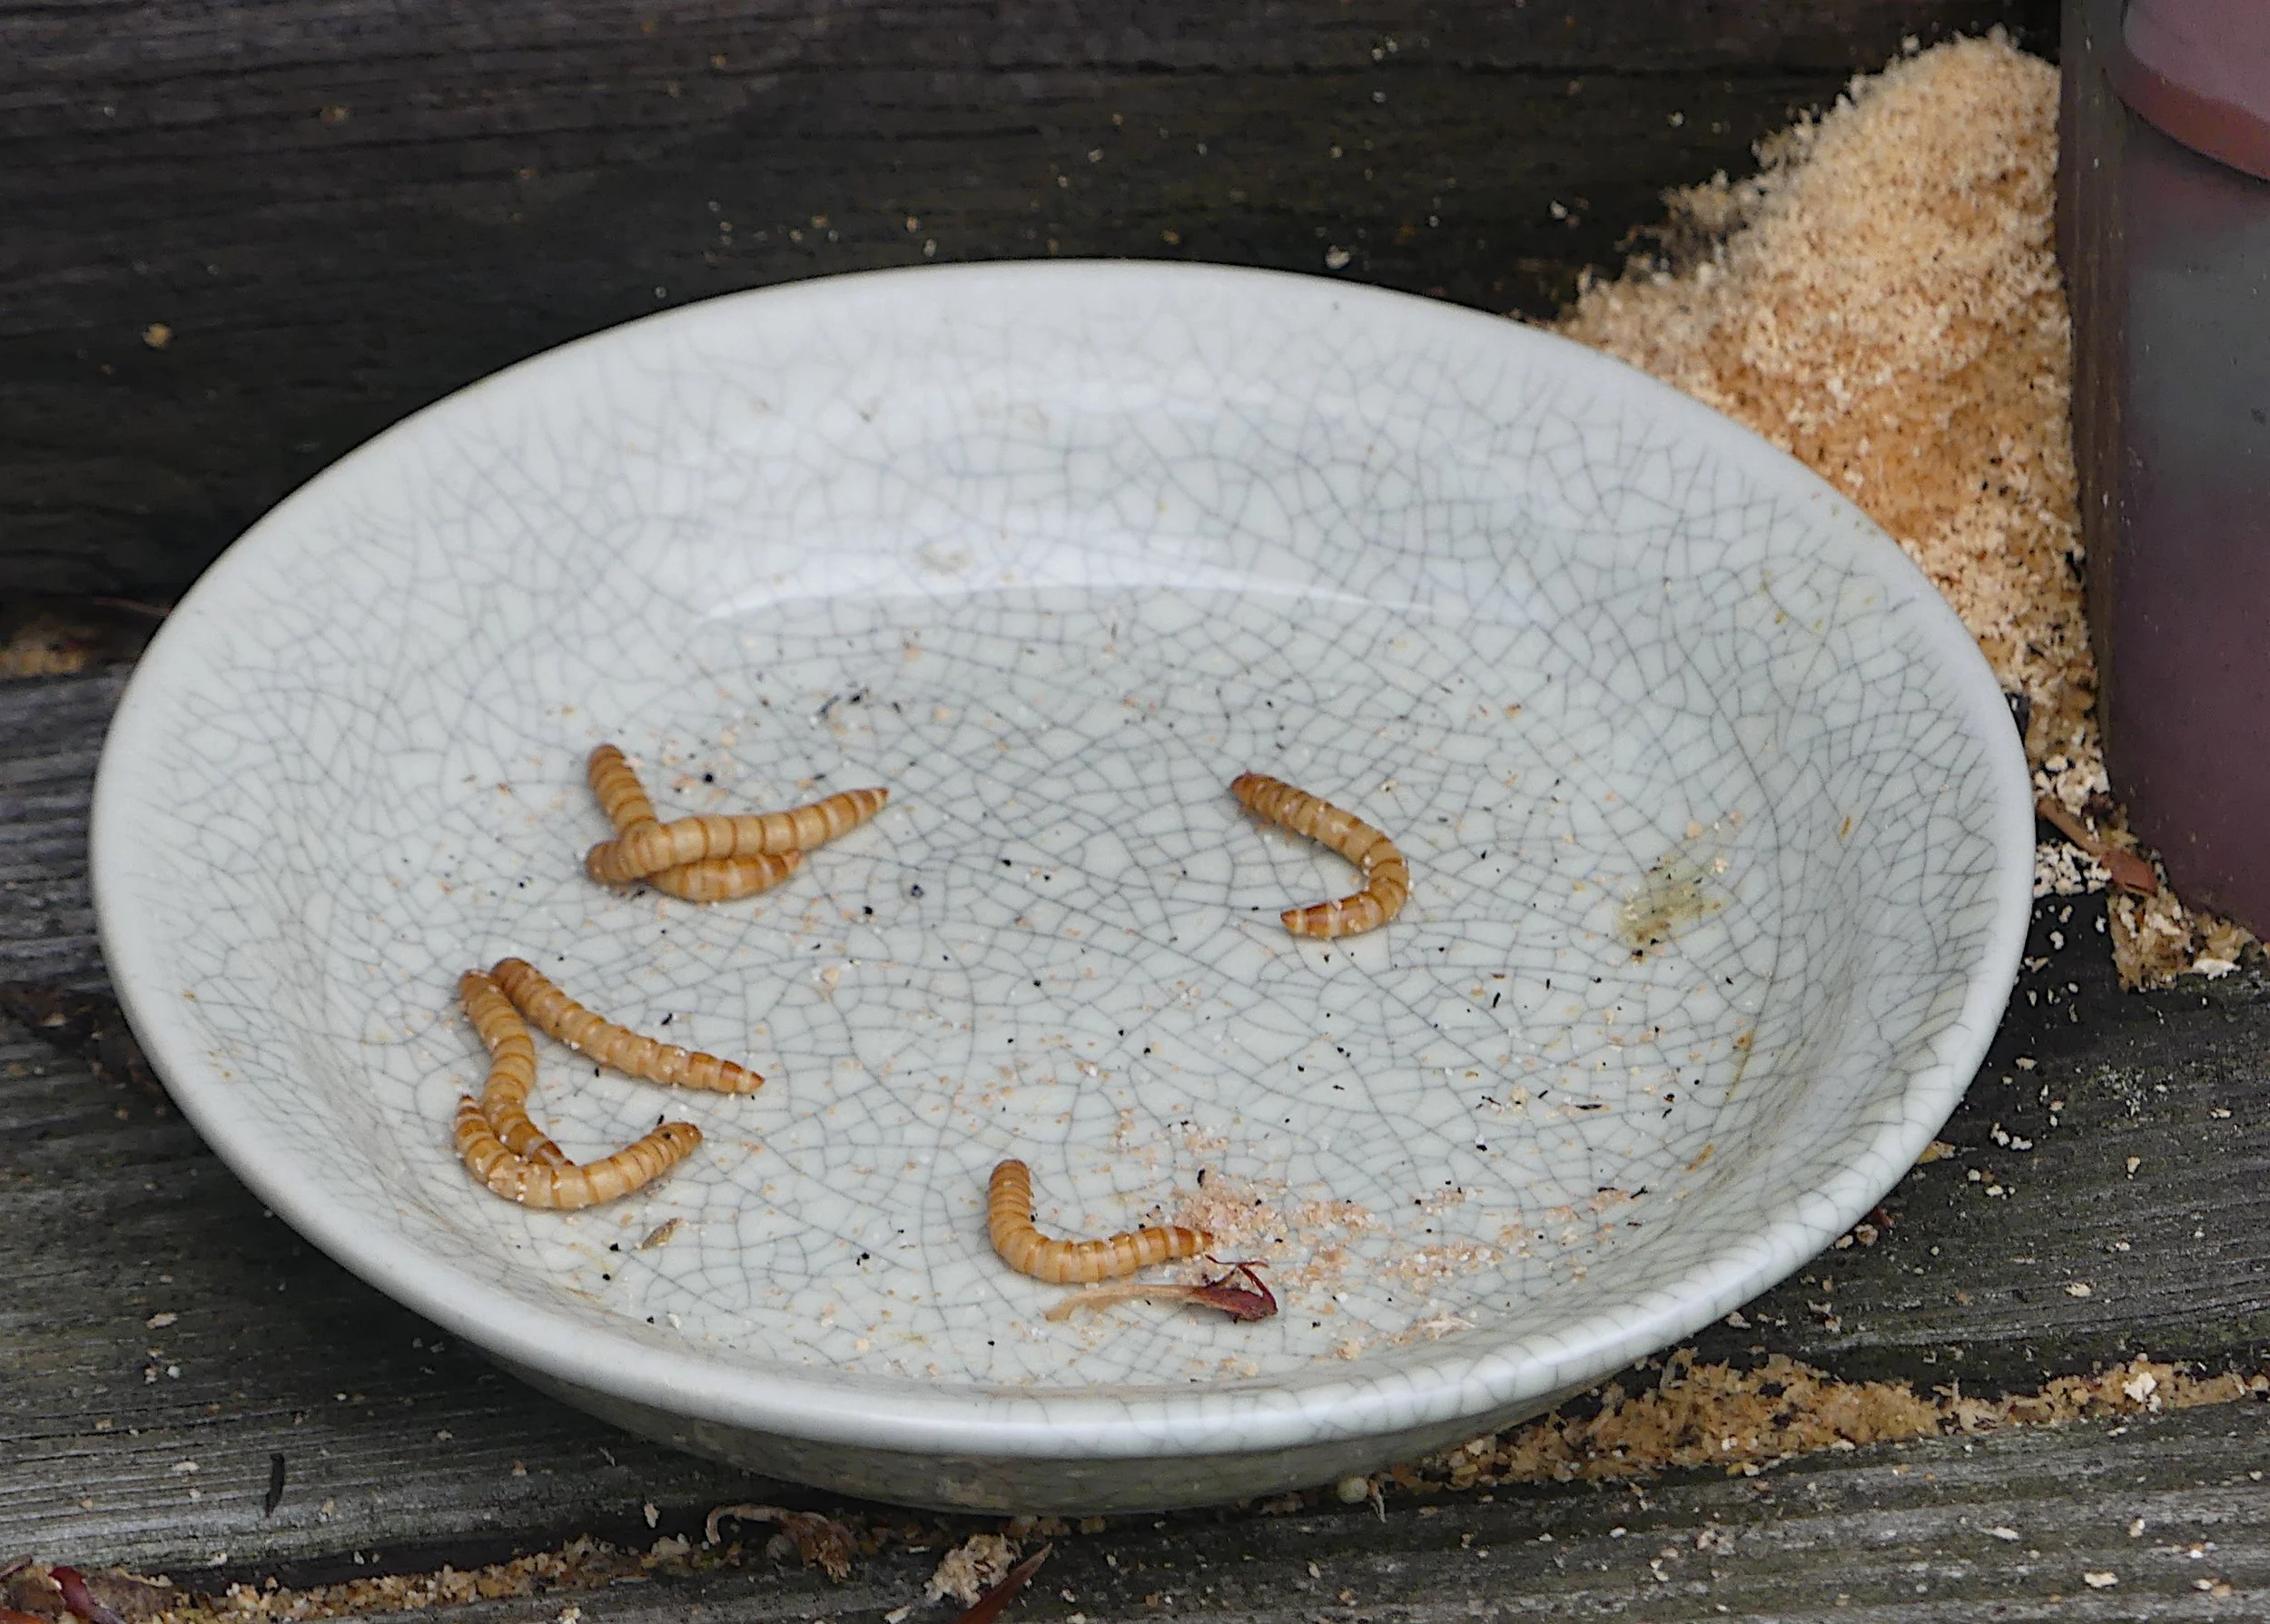
So, why mealworms? I decided to buy some online to feed to the lizards living outside my door on the back deck. The lizards are happy I do this. They now know the plate of worms when I set it out and come running to it. Then I remembered I used to raise a few mealworms in coffee cans. And we also feed dried mealworms to our chickens as a treat. So I went surfing on the web to see what I could find out about raising mealworms on a larger scale. And came up with this initial method that I can scale up to producing many thousands of mealworms per month. Also, I pay $15/thousand to purchase them live. Thinking… possibly a small revenue stream here too, so I’ve tried to keep things inexpensive.
So this page is a little story about how I set up to raise them, and what I’ve learned so far.
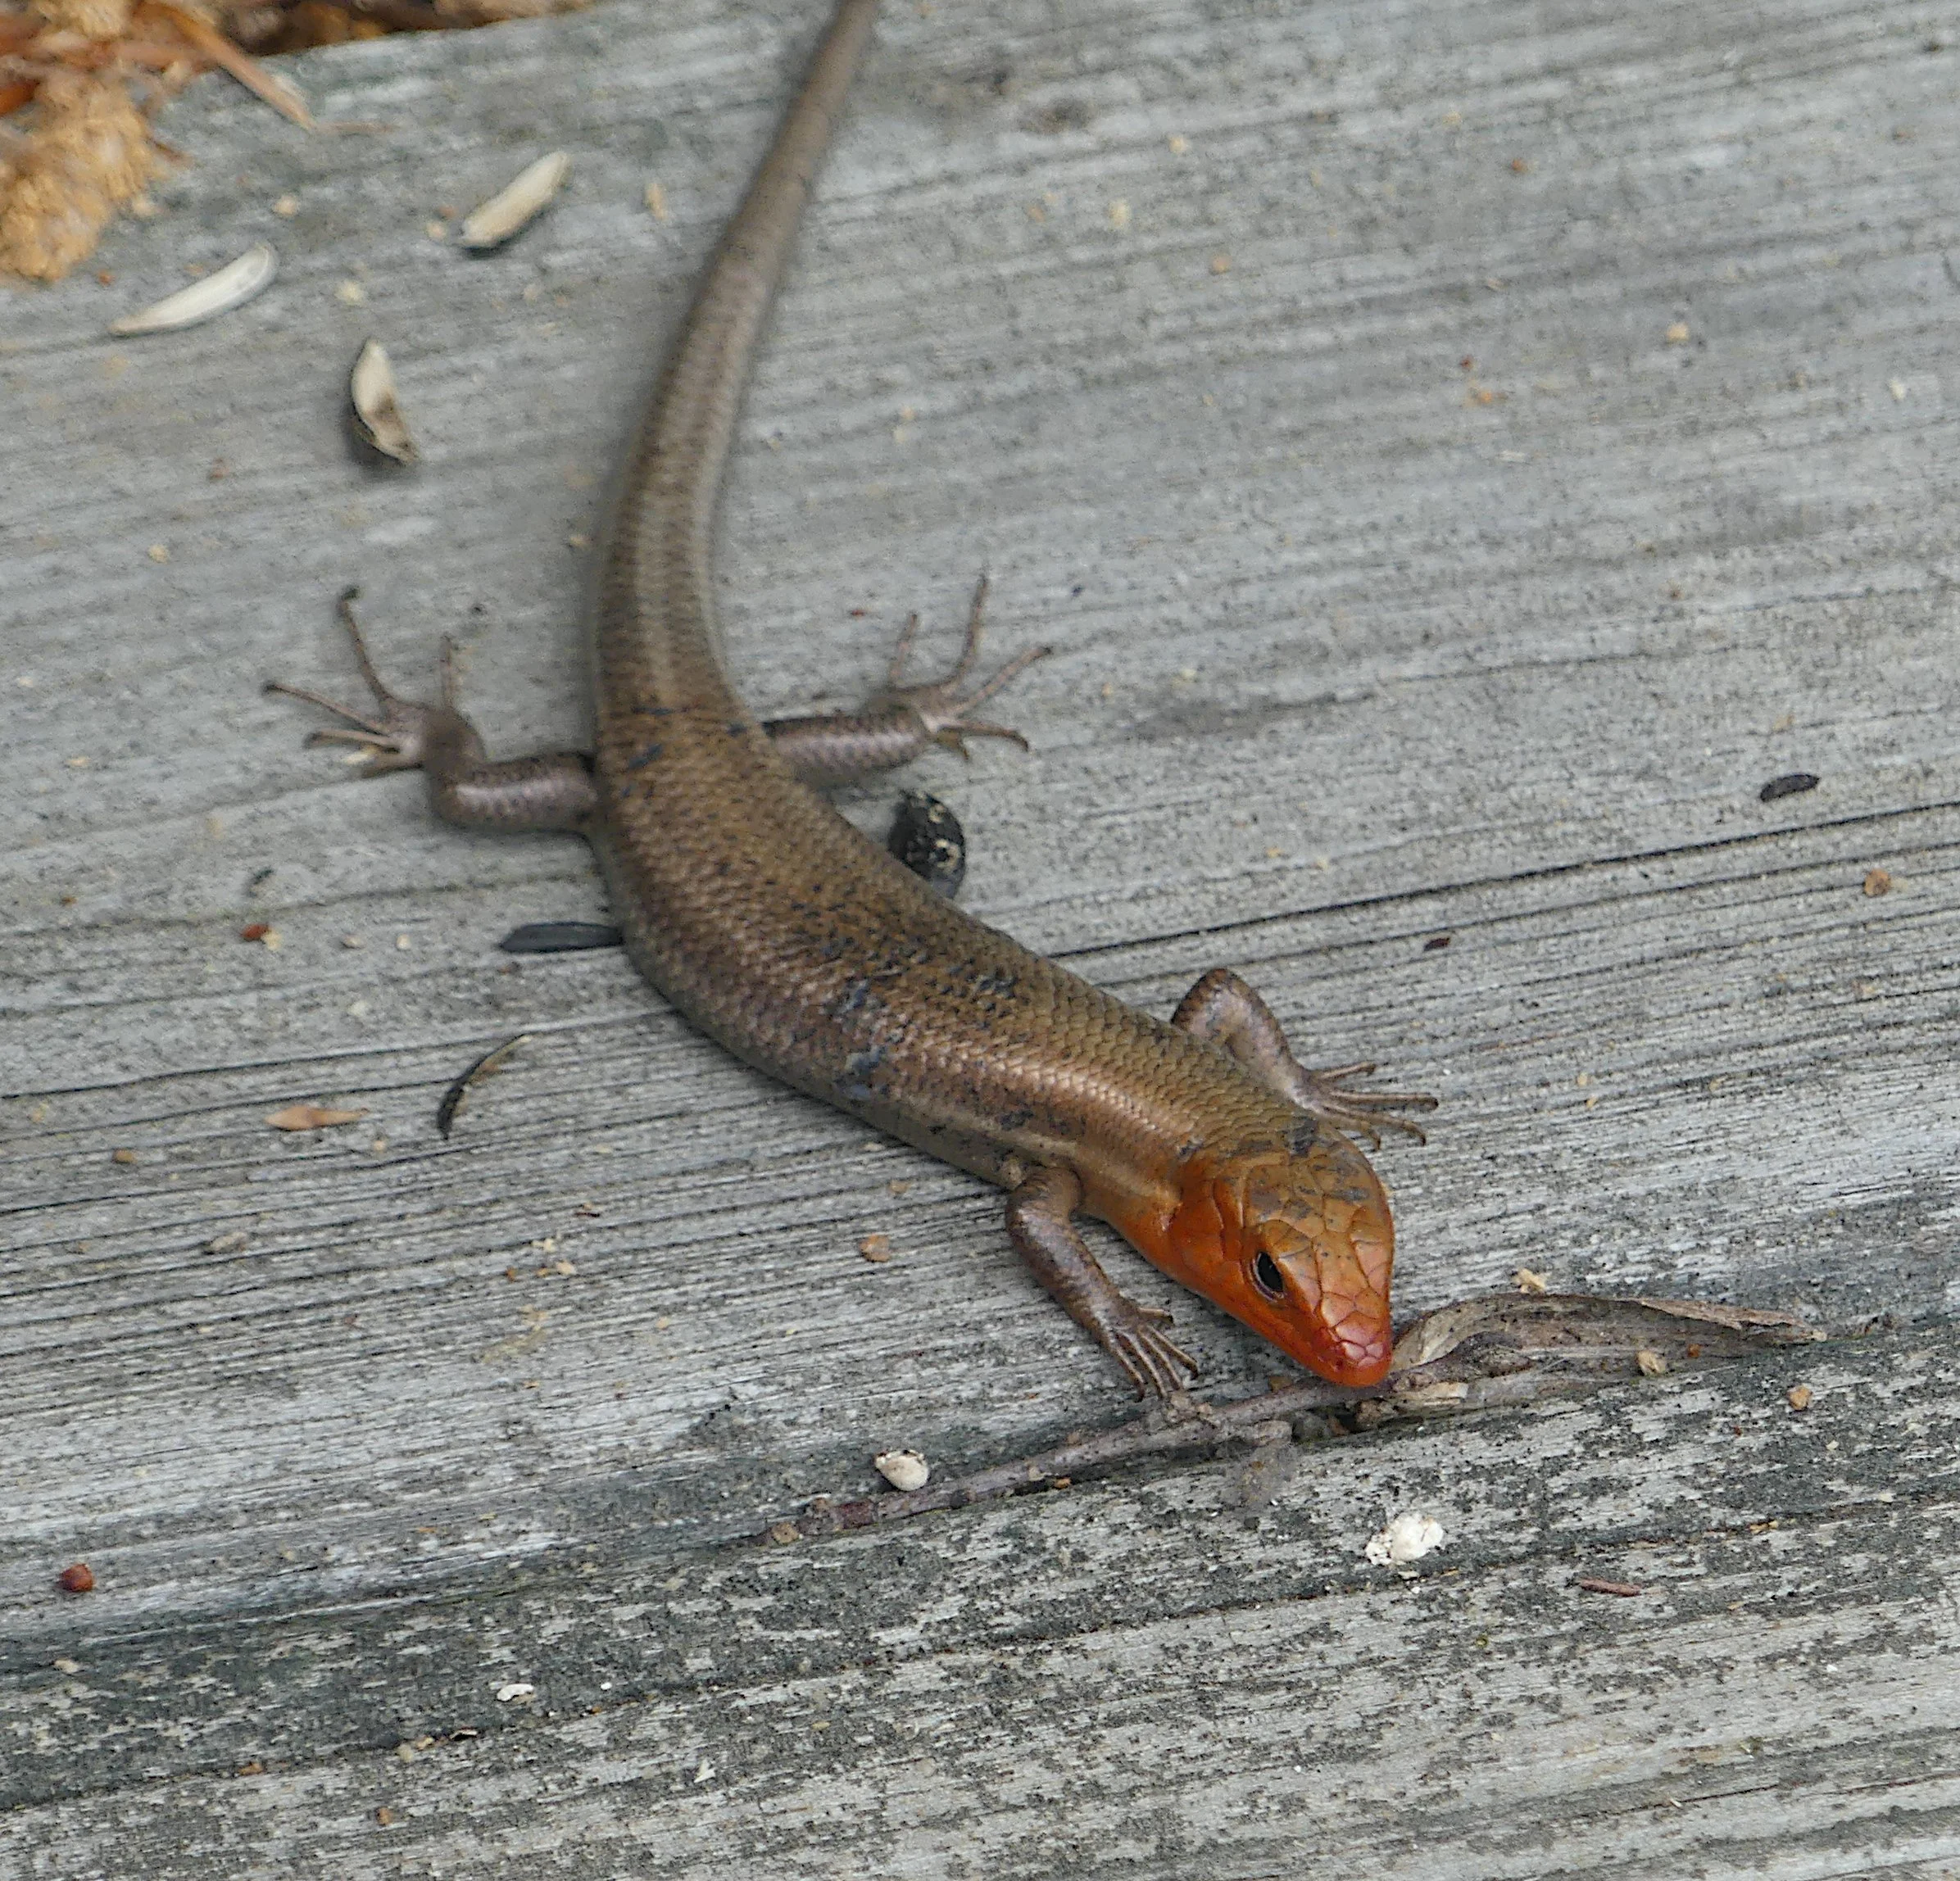
I see the plate. Thanks. Now beat it.
I use gardening seedling trays with clear plastic tops. They are inexpensive. Something like these from Amazon, 10 x 20”. This style has a lip on inner bottom edge of sides good for fastening a screen to.
You will also need a few covers for beetle trays

So, where we are headed is, the mature mealworms turn in to beetles, Darkling Beetles to be precise. The beetles lay eggs. But they also eat them. So they get their own tray with a screen bottom. When they lay eggs, they fall through the screen into another tray below. Then the eggs hatch, and the worms grow in that bottom tray.
The top tray will be referred to as the beetle tray, and the bottom tray as the worm tray.

Constructing the beetle tray
I cut three thin stips of wood to serve to hold the beetle tray on top the worm tray. I also cut notches at 10” to hold them steady on the top lip of the worm tray underneath. I secure the strips to the bottom of the tray with two half inch screws through the bottom of the beetle tray. (hint: place strips with notches on top of the worm tray, set beetle tray on top of them, and drill pilot holes through bottom of beetle tray and strip.) After securing all strips, I run a bead of hot glue along the edges where the strips meet the tray to better stabilize them. Doing every thing by eye has worked okay.
I use my wood burner to cut out two large rectangles. Leave a lip near the sides to fasten screen to. And a strip of tray bottom across the center to cover the support strip and make the tray a little more ridged.
I then cut a piece of 1/4 inch hardware cloth to fit the inside bottom of the beetle tray. This is for support. I add a piece of 1/8 inch hardware cloth on top of this to keep the beetles and most of the oats from falling through.
I burn a pattern of holes to secure the screen. I make them roughly a bit less than 1/8th inch. And space them along the edges every 2 inches. Hot glue will hold the screen down by anchoring into these holes; it is not reliable for sticking to the plastic flat surface. To prepare to glue down the screen I use a few temporary cable ties to anchor the corners and center of the piece of screen. Then I use a hot glue gun and secure the screen permanently. After setting, I remove the cable ties so the 1/8 screen lies flatter.
I lay the 1/8 inch screen and place heavy objects near the edges to keep it flat. Then hot glue many dots around the edge to bind it to the 1/4 screen below.
Last, you can either use duct tape to seal the screen edges, or now, I cut them to fit better and seal the edges to the tray sides with a bead of glue, either hot glue or Goop glue. The beetles are very persistent at exploring the edges and wiggling under and dropping into the worm tray. And if you use tape, use the original brand duct tape, the cheaper stuff pulls loose from the screen. (experience)


Tray with cheap tape

Setting up the Beetle tray
(I only use organic foods for everything. Some commercial products and foods have pesticides that inhit growth or kill them.)
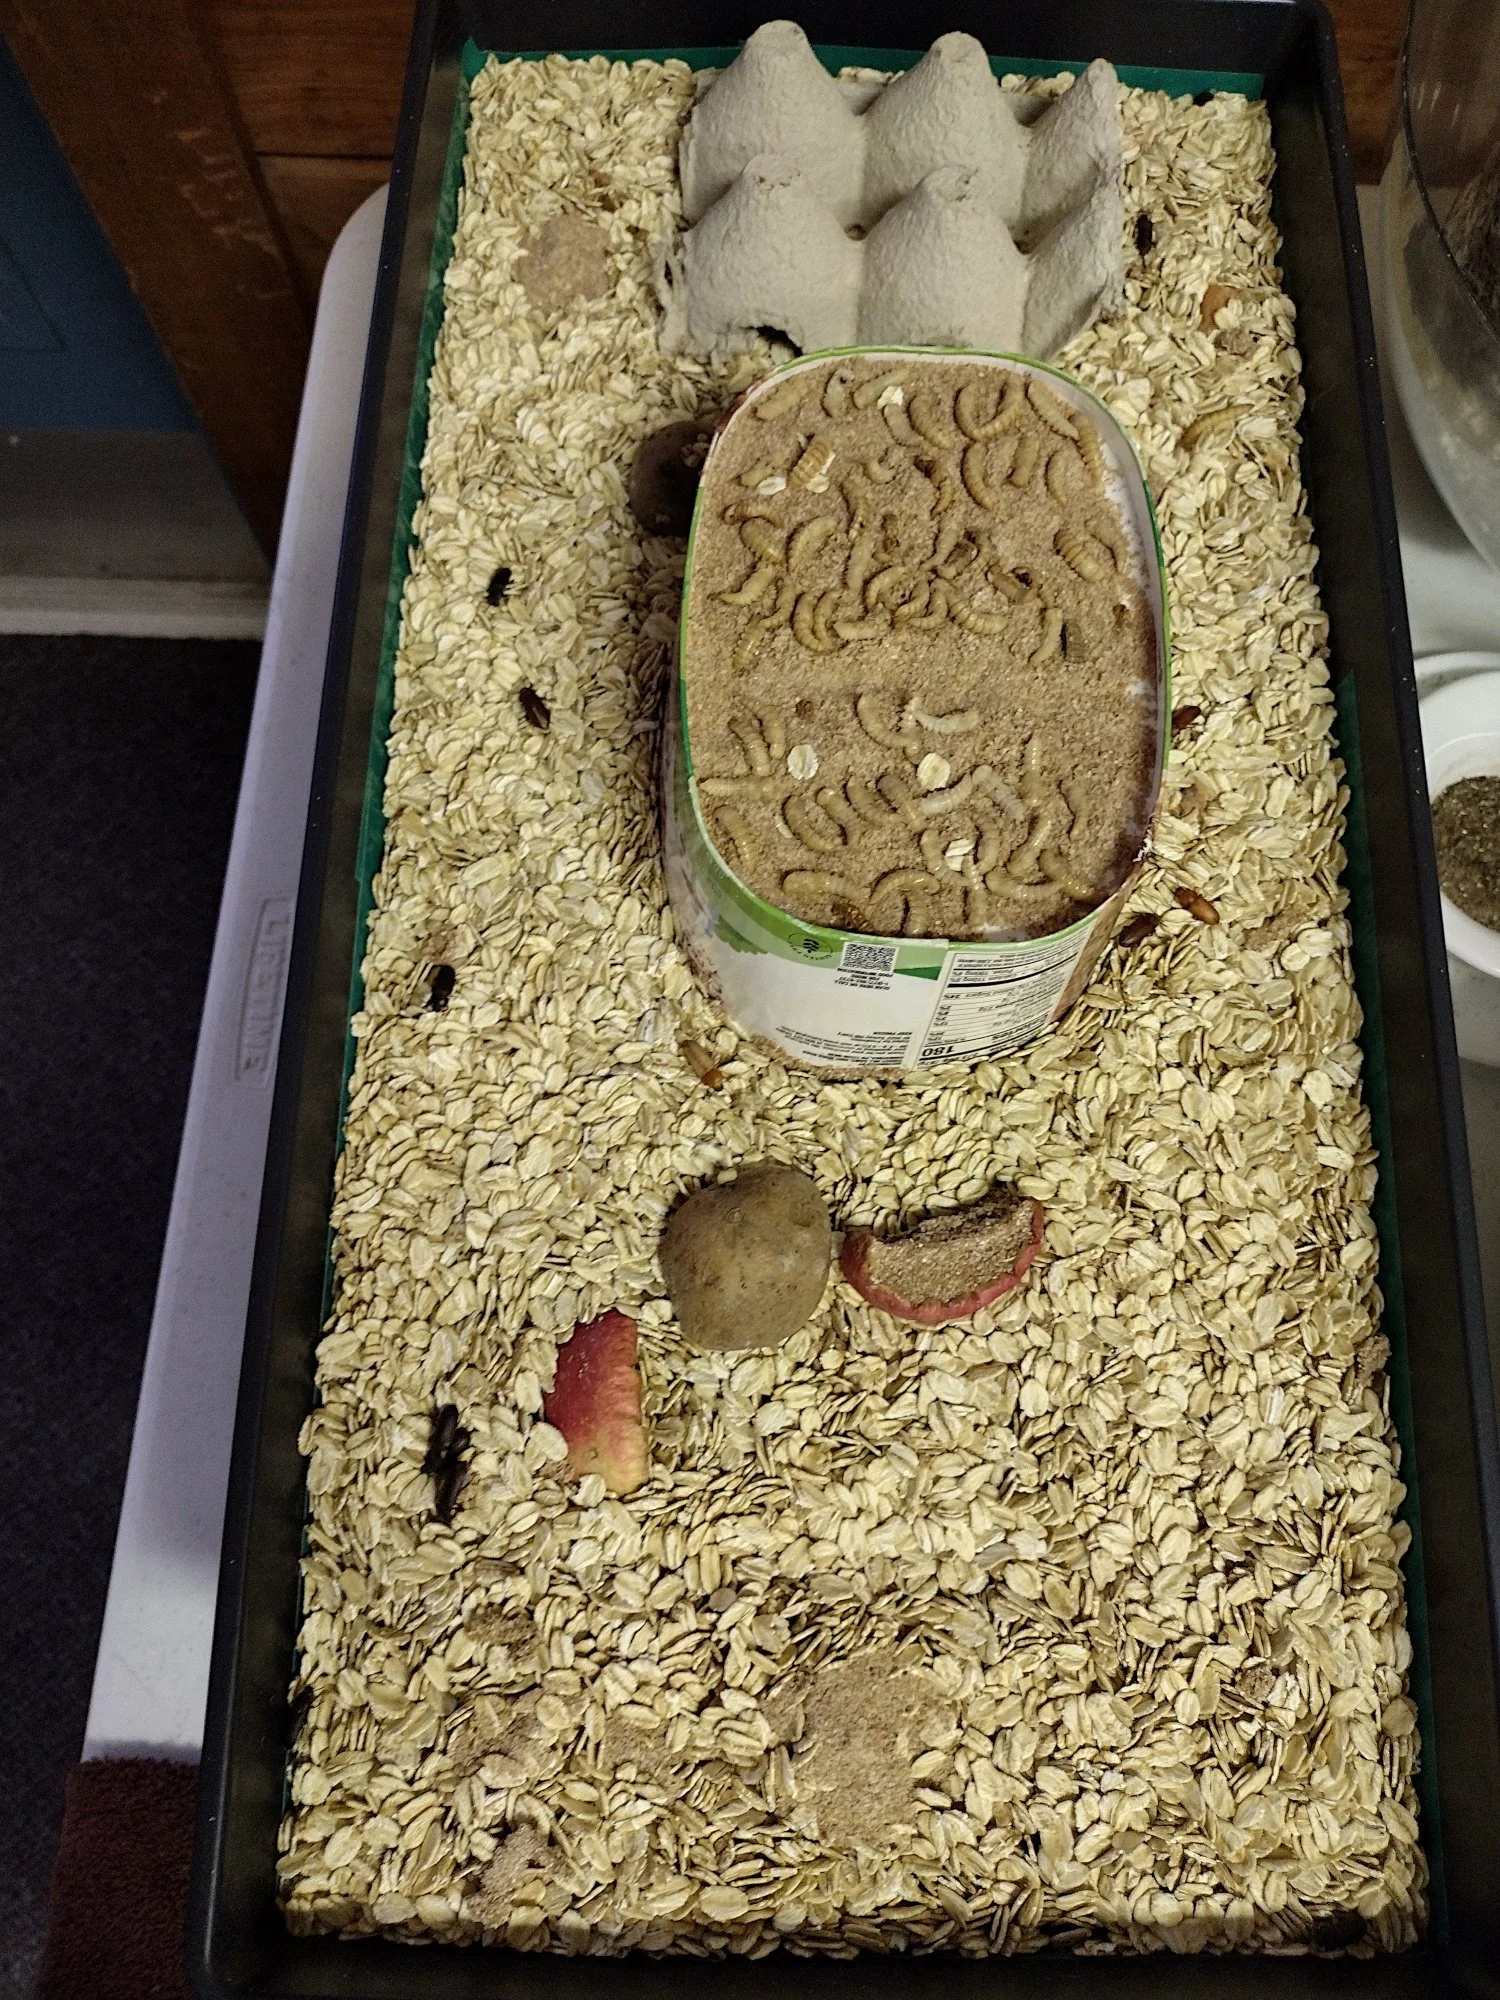
Fill the beetle tray with rolled oats, about 1” deep. This is both the beetle substrate or bedding and some of their food. Leave an inch of space from the top of tray. The beetle can’t climb the plastic. (And they can, but seldom ever do fly. I’ve only seen three try to, and they are not good at it.)
They seem to love card board, so I give them some tp or papertowel rolls and a chunk of egg carton for a meetup motel. I also install a small ice cream carton upside down - or any elevated shape that the beetles can’t climp to put the pupae stage on. More below about that.
I also add small dishes with water as humidifiers - see more below.

Feeding the beetles and mealworms
The oats bedding is their main food. But they need more than that. They need moisture too. So I cut organic potatoes into slices - 1/4 to 3/8 thick and bury them in the oats. I also cut carrots into 1/2 inch chunks and bury those too. Maybe 4-5 potato slices and 6-8 carrot chunks. They also like it when I chop up salad greens and bury patches of those. 4 or 5. And you can treat them with apple slices too, but those rot faster than all the others.
What you want to watch for is - things getting moldy. Getting a bit rotty - they love it, but mold is a problem. They actually like all the things better after they have aged a while so don’t remove old food unless it is growing mold.
Then I add a dish of wheat bran and one of corn meal, organic and a coarse grind if available. I use petri dishes and bury them a little so it is easy for the beetles to crawl in and out. Both the bran and meal will work down and fall through the screen if it is not in dishes. The beetle churn up the oats a lot.
It’s curious that they take turns on their favorite food of the day. One time many are piled on carrots, another time, on the bran or corn meal, or potatoes. They also like slices of hard boiled eggs that I just lay on top the oats; I’m hoping that supplying protein will get them to eat less of their eggs.
They seem to like carrots the best. I just like to spoil them with all. Getting them Netfix for the motel next week.
Again, I use organic for all foods. One source I use, being in central Virginia where organic food is scare, is Azure Standard
The worm tray food is they same as for the beetle tray - except - I put in mostly wheat bran - course grind if you can find it - about 1 to 1- 1/2 inch and add a layer of oats on top, 1/2 inch and stir them up a bit. Then bury all the other food like in beetle tray. (I find the baby worms clustered around the buried carrots.)
Setting up the worm tray
Besides the substrate and buried food, all the worm tray needs additionally is a couple-few humidifiers. The petri dish is just for experimenting. I can look everyday and see how many bettle eggs have landed on it, and guessimate the total tray count. 20 eggs on the petri dish lid? At least 10 times more for whole tray - that’s 200+ eggs a day, or 6,000 a month!
The beetle tray will sit on top of the worm tray so no cover is needed for the worm tray.

Humidity control is very important!
Wild mealworms live under damp decaying stuff. They need to be in an environment above 50% humidity, or else they will dry out and die, and this applies for all life stages. My preliminary experience has been that they do best between 60 and 70% humidity. I try to aim for 70. At 75% the food in the tray grows mold faster. At 85% I had some beetles and pupae die. I’ve noticed the beetles are noticeably more active at 60% and above.
In general, I maintain the humidity by placing a cover over the trays, using a dark out curtain, as they also like dark. Eventually they will be in a closet with no AC. The AC blowing around drops the humidity and the cover much prevents that.
The buried fresh foods provide some humidity. And I further provide little humidifiers - paper towels rolled up in small dishes to wick water vapor into the air. I am using used-up plastic tea candle holders for the dishes. If I need more humidity - add another dish, or remove as necessary. Soak the towel with water. Try not to get liquid in tray too much; it turns the wheat bran into glue bricks.
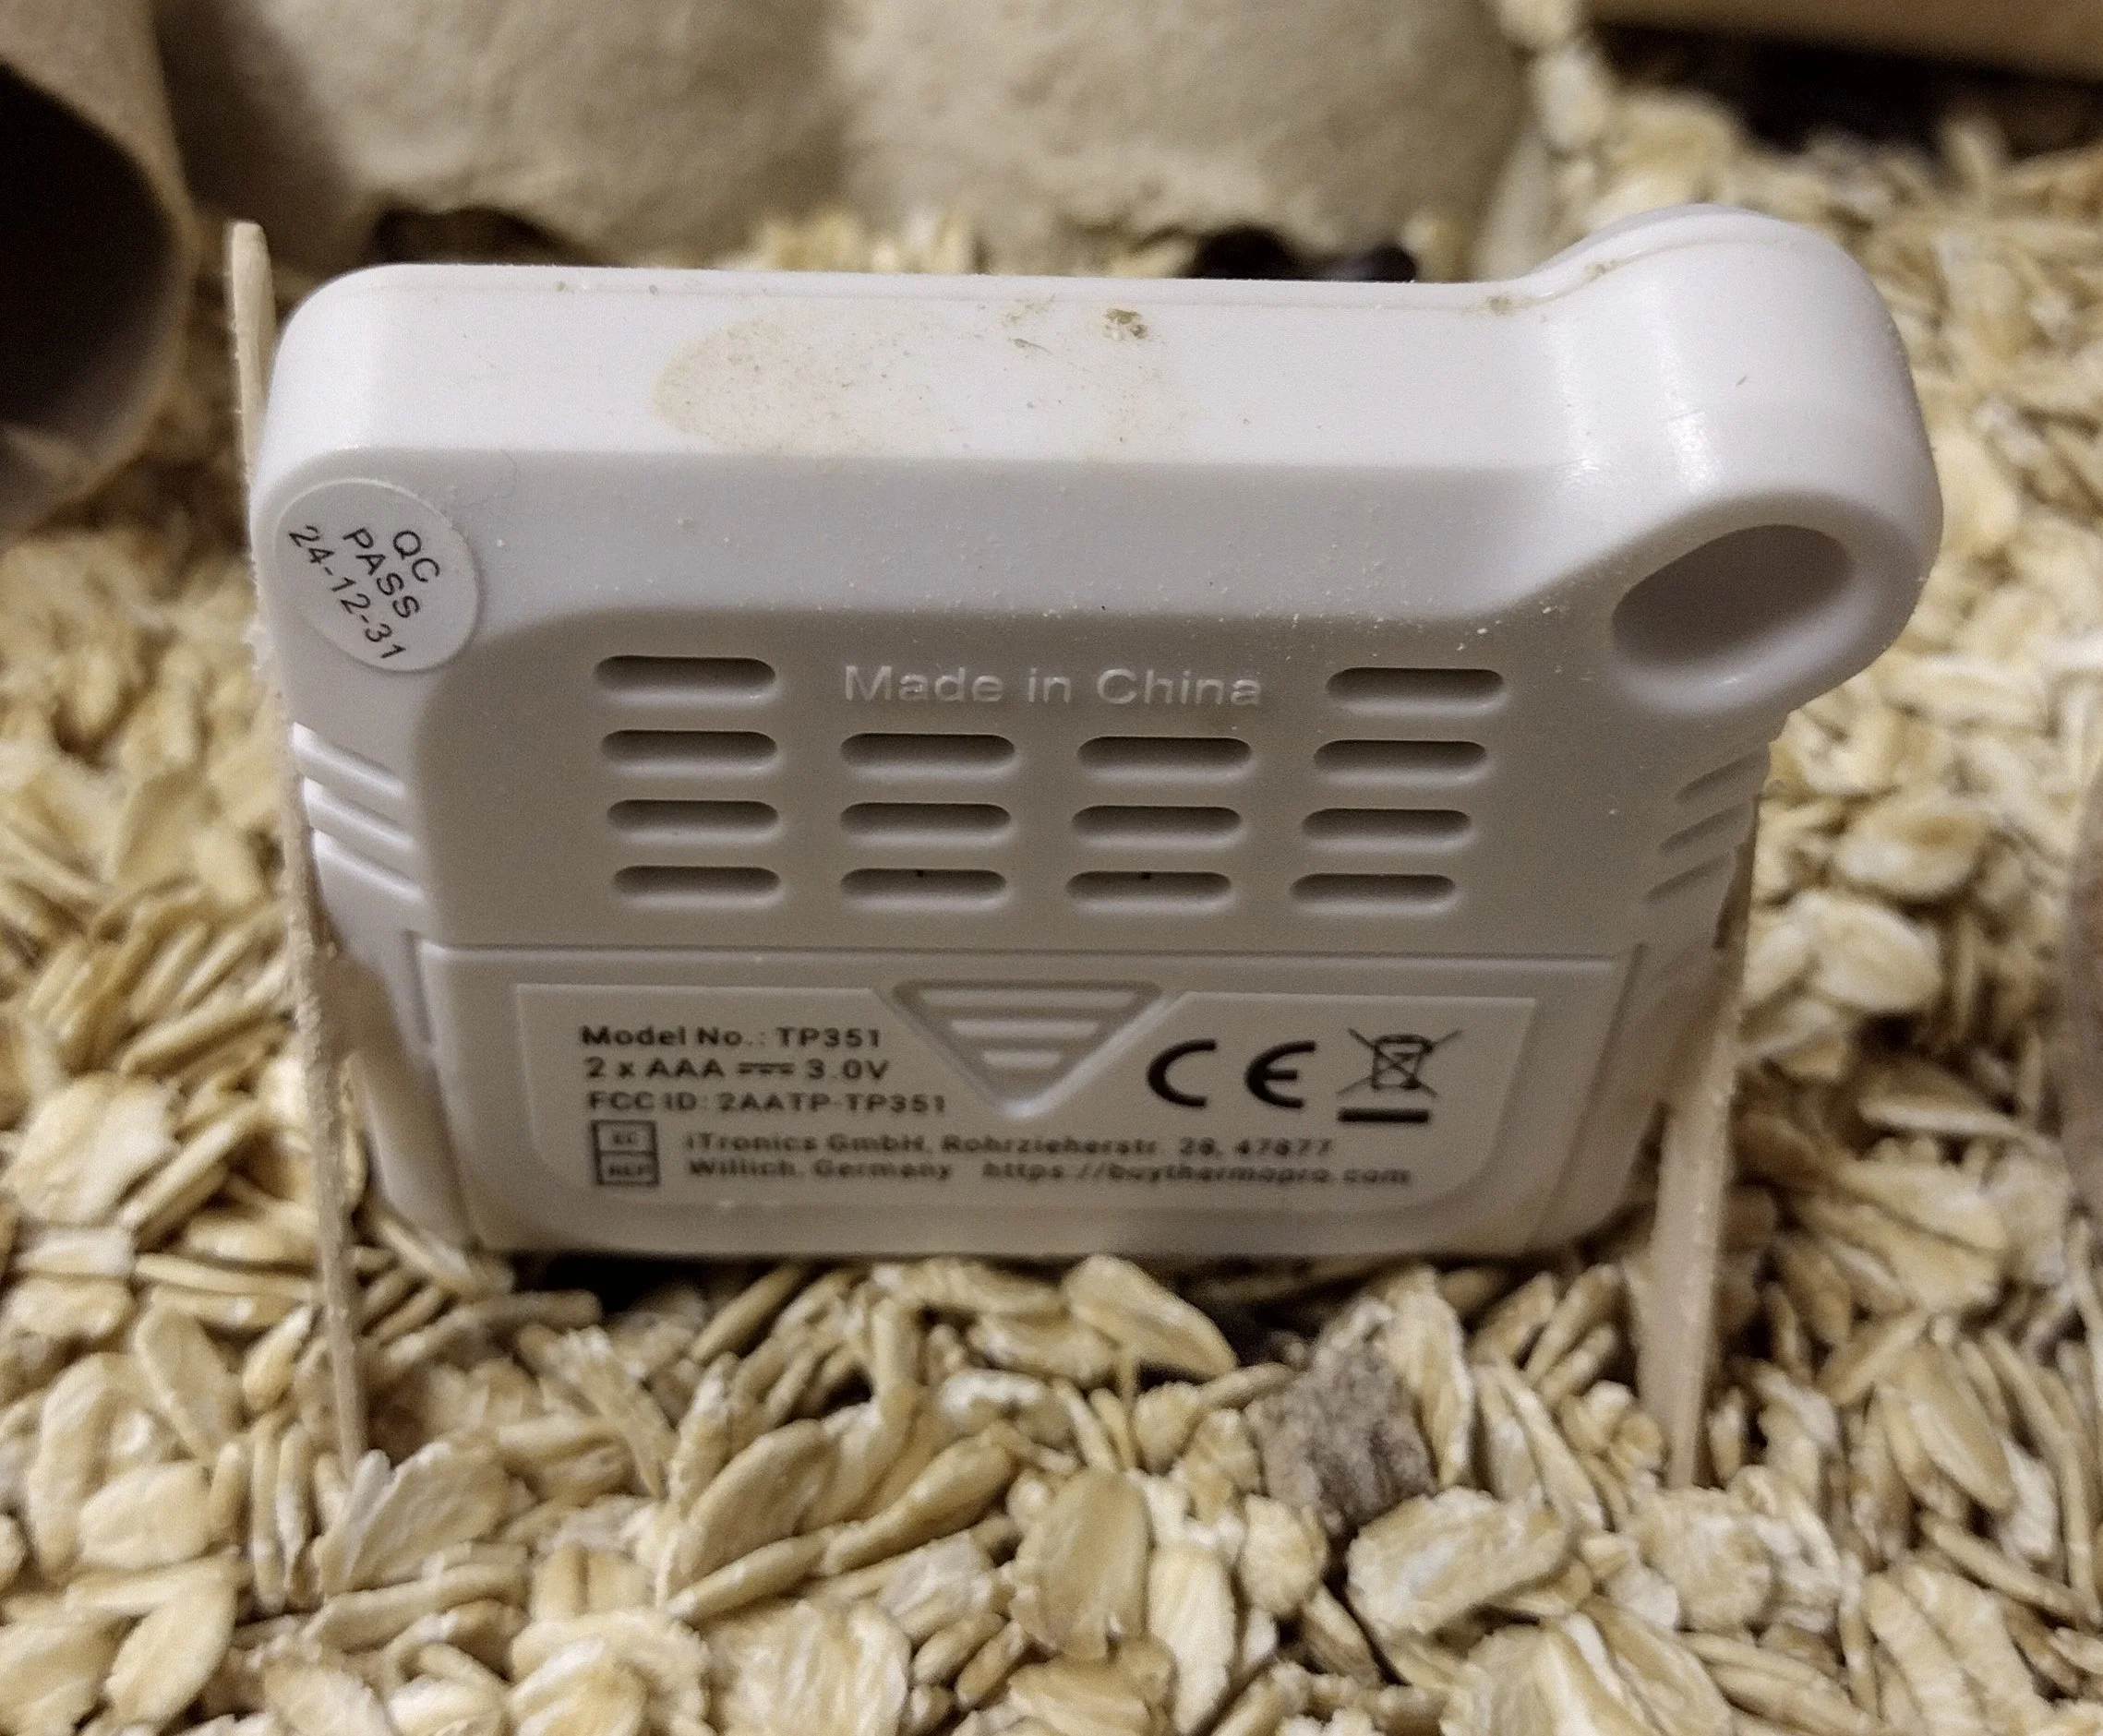
I use this little humidy sensor I got on amazon, $12, link on box picture. It reports to an app on my phone so I can watch it easily without lifting the cover and lid, which disturbs the temperature and humidity. I built a little stand for it with coffee stirers and hot glue. It tilts slightly forward so when in worm tray so stuff doesn’t fall into it from beetle tray.
I also make covers for the humidity dishes so debris falling from beetle tray doesn’t get on wet towel and rot. Using the wood burner, I cut off the bottom of 1 litre bottles and cut out large areas for the water vapor to move to the tray atmosphere.


Mealworm growth cycle
When we purchase mealworms, they are close to maturing. They will turn into a pupae, and the beetles will emerge from them. Then the beetles will lay eggs, which hatch into new tiny worms. The time spent in each stage will vary depending on () the temperature, () humidity, () and their diet. Warm, comfortably humid, and well-nourished mealworms will grow or change faster at every life stage. 75 degreees F seems optimum. They will just grow slower at lower temperatures. And you can put worms in a container with some substrate and place in the frig at 40 deg. And they will go dormant and keep at that stage of growth for months. Colder than 40 will cause them to slowly die off.
I can only give rough time estimates at this point from what I have observed.
Eggs take about 10-14 days to hatch
I’ve only read that the hatched worms take up to three months to mature and pupate. We will see.
The pupae take 10-14 days to transform into beetles.
The beetles take 2 weeks to mature before they start laying eggs. I’ve read each female beetle will live 3-5 months and lay 300-500 eggs over that time.
That all adds up to 5 months total life time for each generation.
I will let the beetle tray stay over a worm tray for 1 month. Then set that worm tray aside on its own, and place a fresh worm tray underneath. Ideally, if I get enough beetles laying eggs, I would use only two weeks to seed each worm tray with eggs, so the maturing larvae (mealworms) will be more the same size. I currently have over a hundred beetles in each beetle tray and will have to wait and see how many worms develop.

Purchased worm. Waiting for them to pupate.

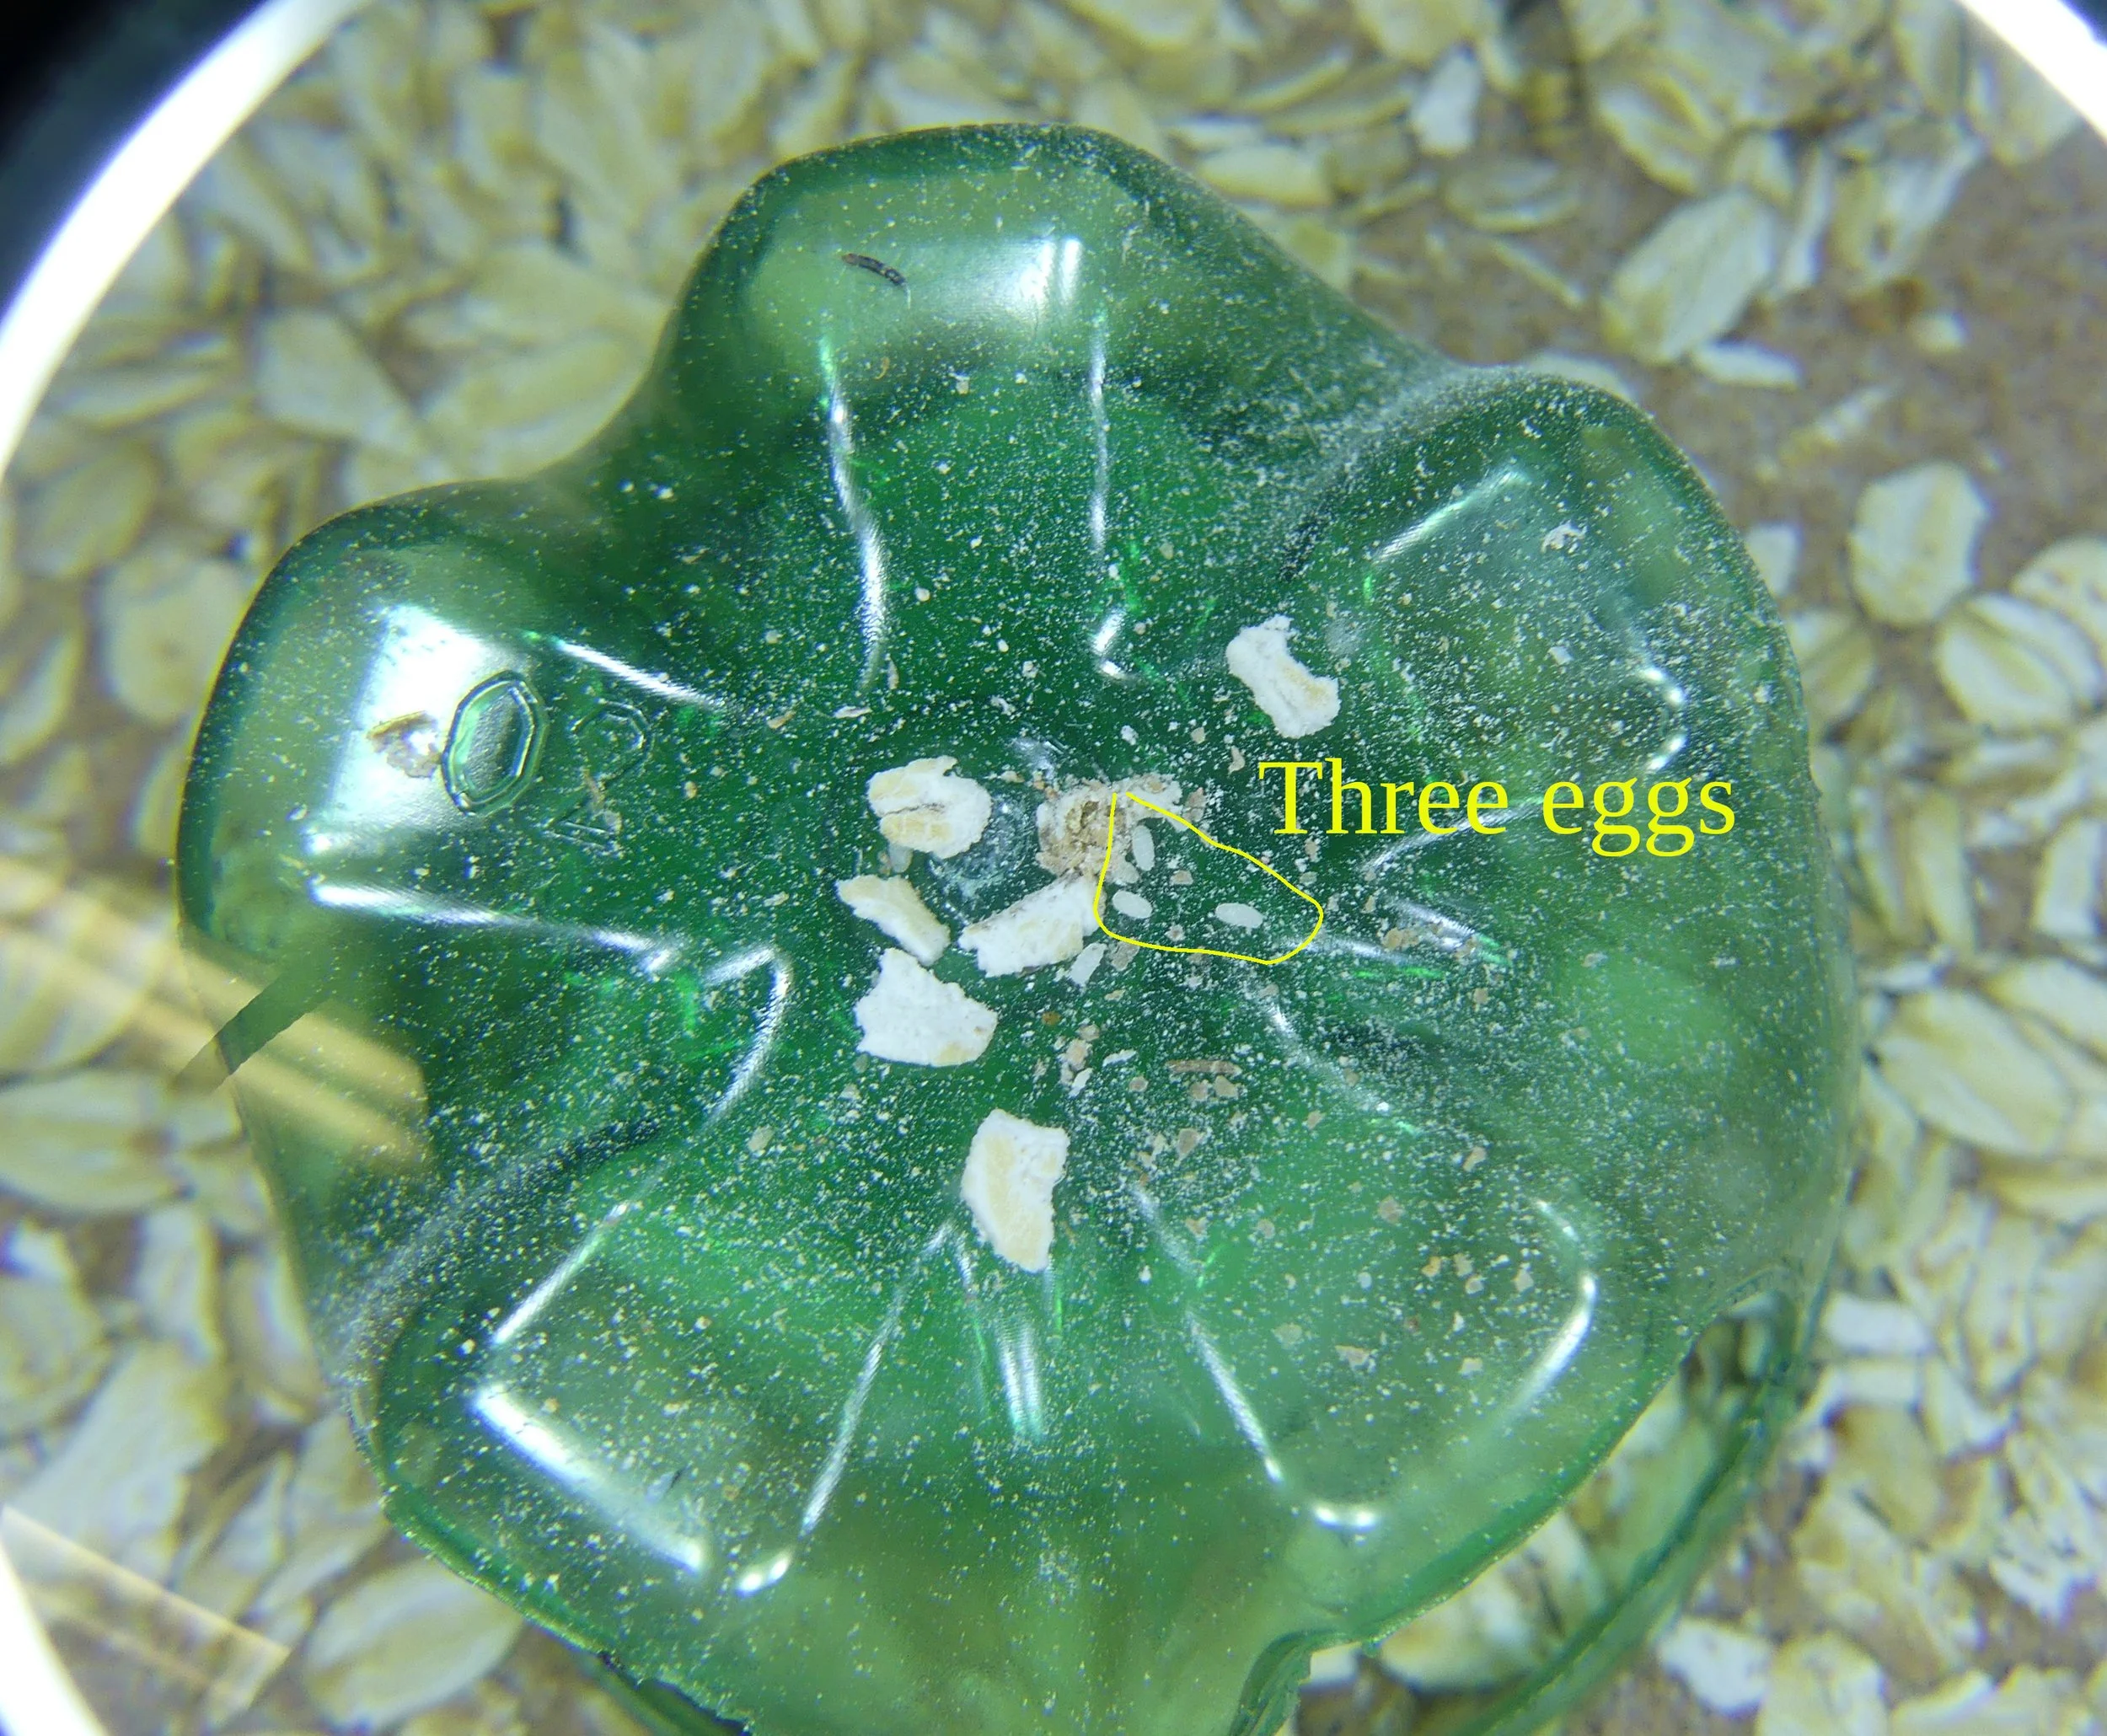
Initial pupae. Eventually covered entire surface
How it works.
Once pupae begin to appear, the mealworms are ready to harvest. Some will be reserved to pupate and make a new batch of beetles. The pupae are placed on the elevated stand (upside down icecream box.) When the beetles emerge they go exploring and fall off the box onto the beetle tray. The pupae are kept separate because beetles may chew on them if accessible to them.
After a couple of weeks, they borrow in the oats and lay their eggs at the bottom of the oats. The eggs drop through the screen into the worm tray. The eggs are sticky and may remain on oats, but as soon as they hatch the new larvae will drop through the screen. They like to go down.
The bottom worm tray will be replaced with a new tray every month. The worms continue to grow in their tray for about 3 months.
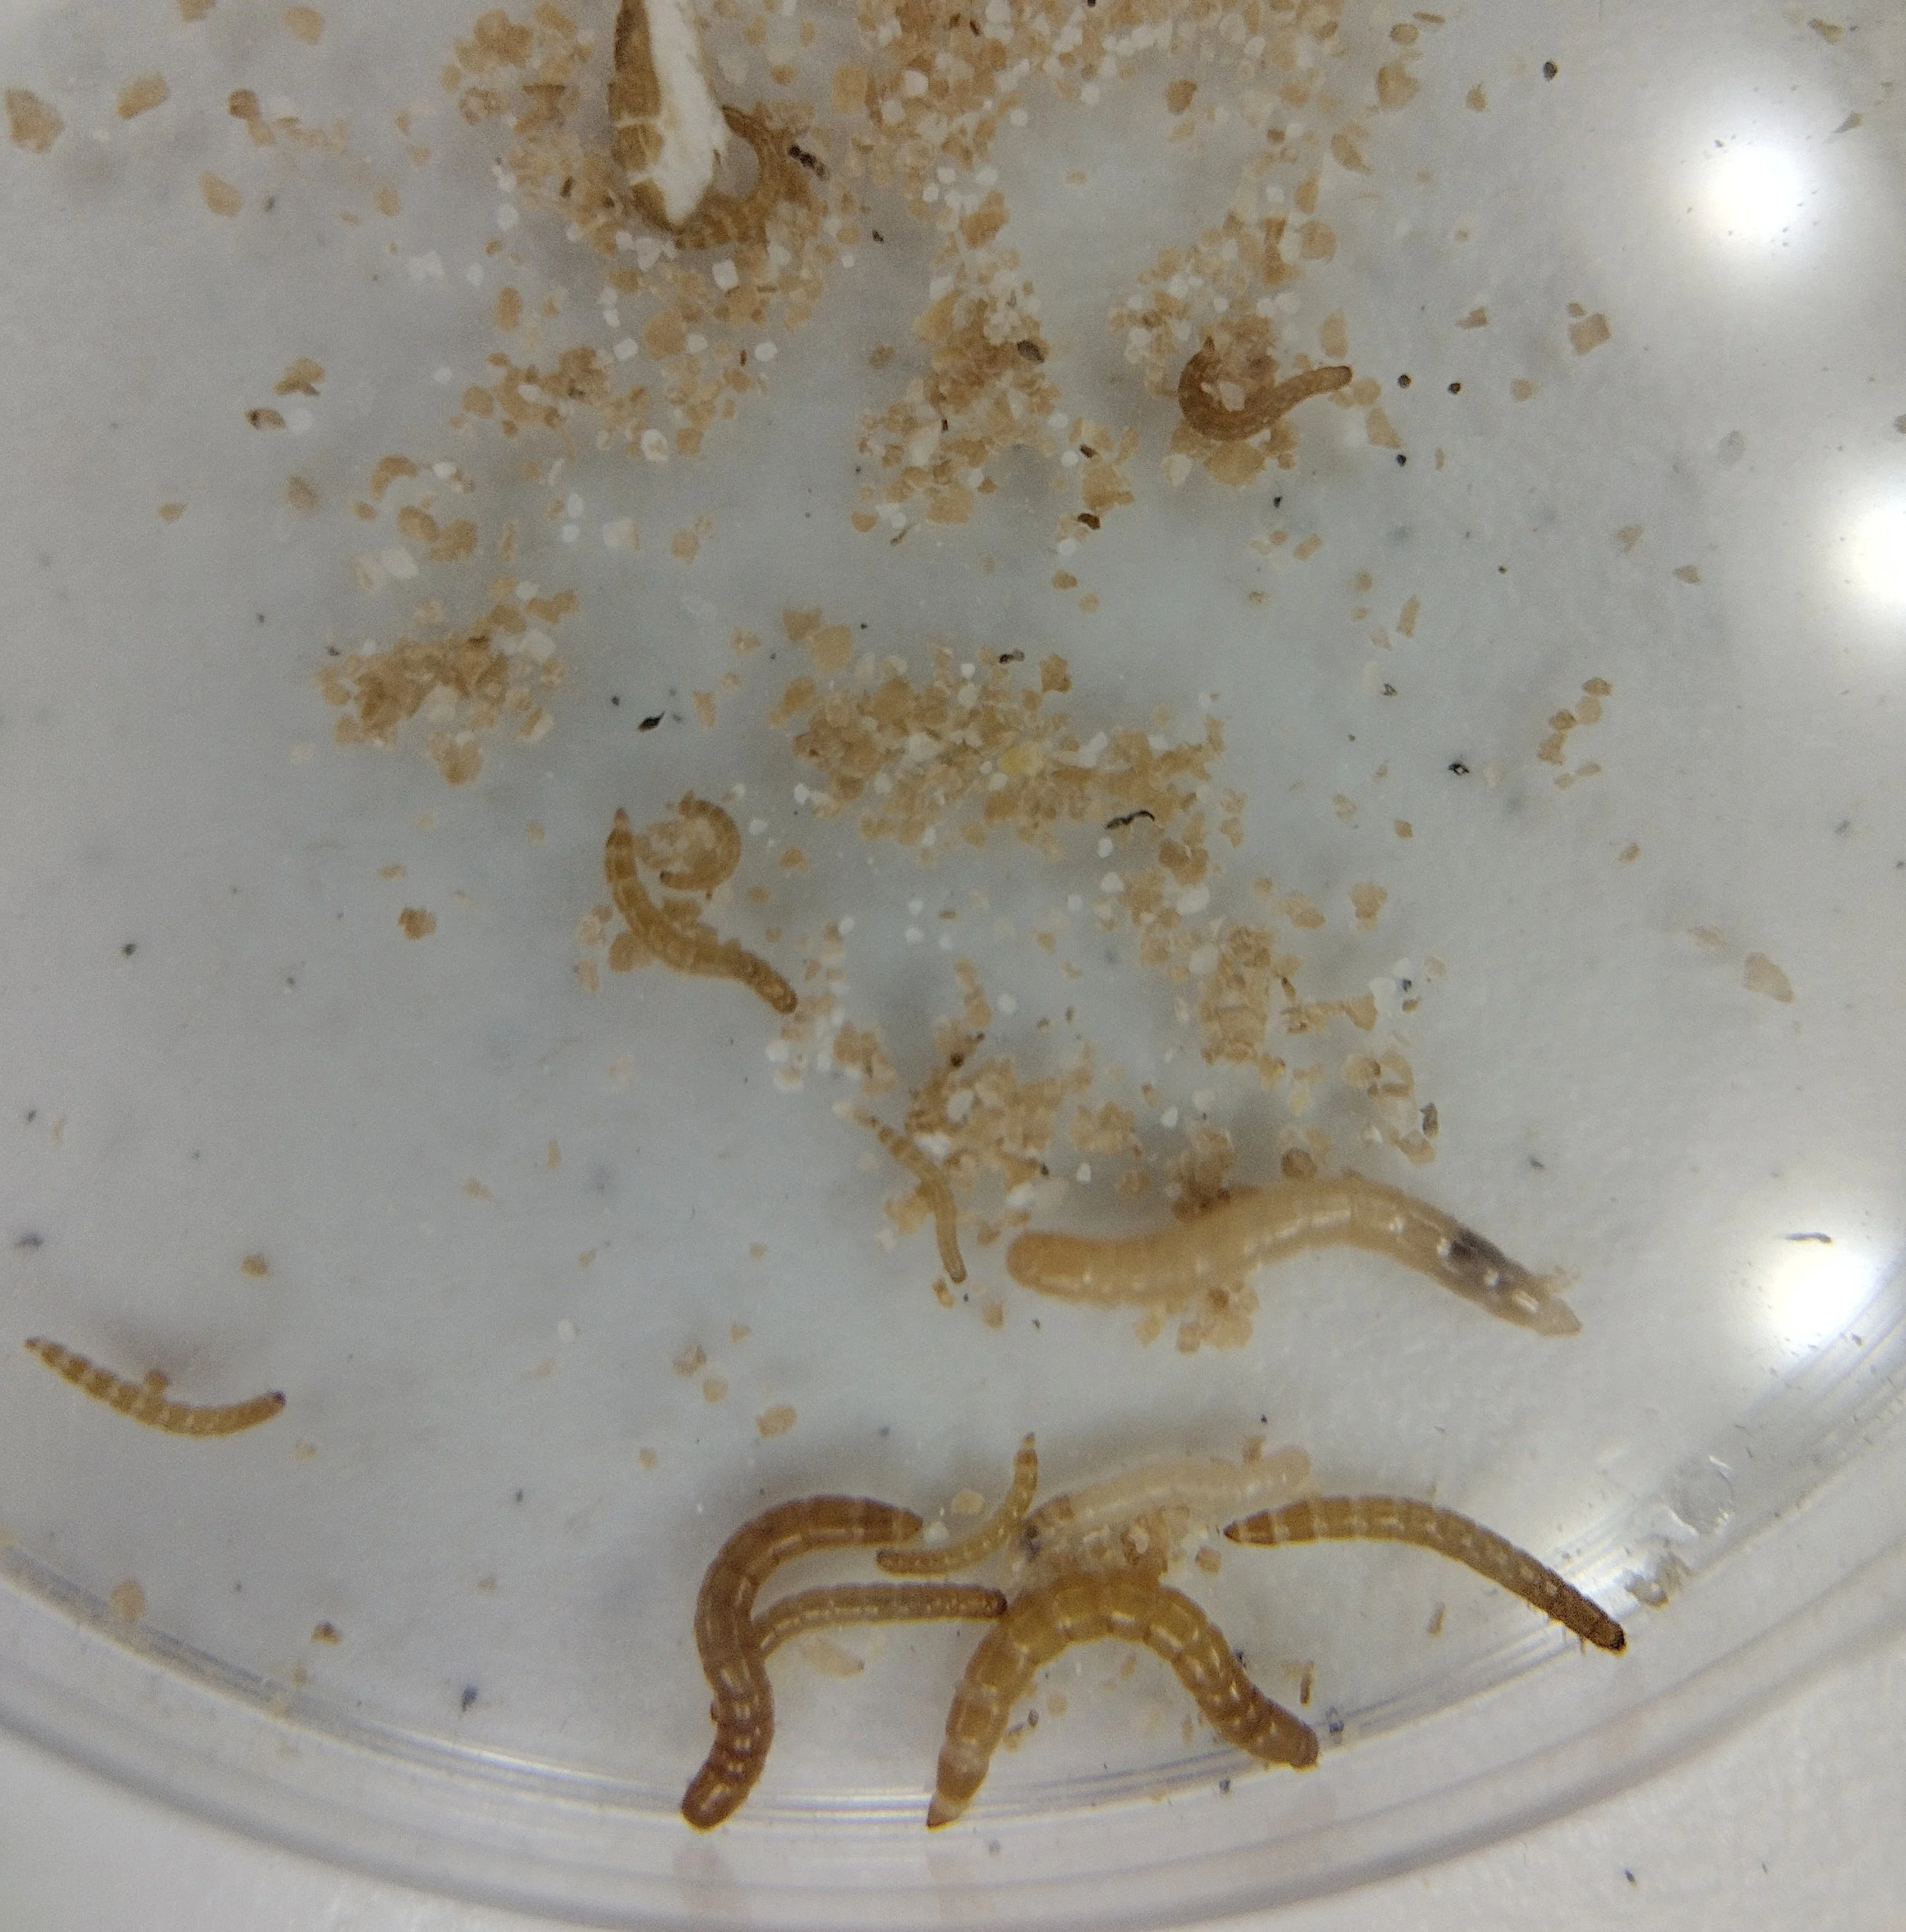
< Some various size baby worms. The original worm tray has been seeded for 8 weeks.
Baby worm on a spoon next > to grain of rice. I use a spoon and small soft paint brush to move them around.

Summary
I personally find mealworms, and pretty much all living things - fascinating. And there are mealworm groups on many social media. So I made up this page to share my experience, and what has worked for me. I will update this page as I gain more experience.
May the Worms be with you
Additional thoughts
1000 mature worms ~ 3.5 oz ~100 gr.
put beetle trays over worm trays with just a little substrate in them. Every 2 weeks combine new worm trays, so () all worms near the same size and () fewer worm bins needed to raise to mature.